How to manually install TeamViewer on your system
If you are unable to install TeamViewer from Microsoft App Store, you can install it manually.
Steps
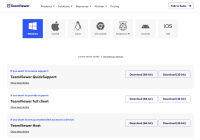
- Browse to TeamViewer Download Page.
- Your current Operating System will be selected automatically. If not click on the OS installed on your system.
- Various versions of TeamViewer will be displayed in the list below.
- Download TeamViewer QuickSupport.
- Windows Users please #Check System Type before downloading
- Install downloaded TeamViewer_QS installation file
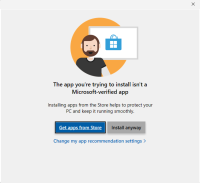
- A Microsoft Store dialog box may appear based on your app installation setting. You can change these settings from Settings > Apps > Advanced app settings.
- Click on Install Anyway.
- After installation is complete, A EULA and Data Processing Agreement dialog box will pop up. Check the checkbox and click on Continue.
- Share your TeamViewer ID and Password with your support person.
- The support person will enter your credentials and your TeamViewer session with OdataLink will start.
Check System Type
- Windows users will have to download 32-bit version or 64-bit version of TeamViewer depending on their processor type.
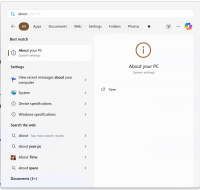
- To check your Processor type, click on Windows button and Type About.
- Click on About your PC System Settings.
- A 32-bit or 64-bit operating system will be specified besides System Type label.
- Select the TeamViewer version based on the bits


