How to manually install TeamViewer on your system
Jump to navigation
Jump to search
If you are unable to install TeamViewer from Microsoft App Store, you can install it manually.
Steps
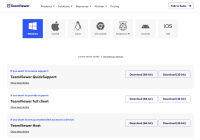
- Browse to TeamViewer Download Page.
- Your current Operating System will be selected automatically. If not click on the OS installed on your system.
- Various versions of TeamViewer will be displayed in the list below.
- Download TeamViewer QuickSupport.
- Windows Users please #Check System Type before downloading
- Install downloaded TeamViewer_QS installation file
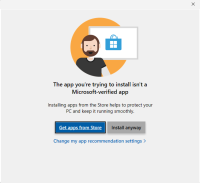
- A Microsoft Store dialog box may appear based on your app installation setting. You can change these settings from Settings > Apps > Advanced app settings.
- Click on Install Anyway.
- After installation is complete, A EULA and Data Processing Agreement dialog box will pop up. Check the checkbox and click on Continue.
- Share your TeamViewer ID and Password with your support person.
- The support person will enter your credentials and your TeamViewer session with OdataLink will start.
Check System Type
- Windows users will have to download 32-bit version or 64-bit version of TeamViewer depending on their processor type.
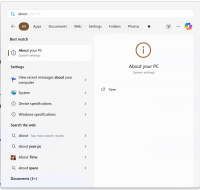
- To check your Processor type, click on Windows button and Type About.
- Click on About your PC System Settings.
- A 32-bit or 64-bit operating system will be specified besides System Type label.
- Select the TeamViewer version based on the bits


